TRAVEL AROUND THE WORLD with AEROCENE
More
Aerosolar sculptures are able to rise off the ground because of variations in air temperature and density. When the air inside the balloon gets warmer, its density decreases, and less dense air rises. Aerosolar sculptures can carry super light technologies and the SensAIR device.
Since Aerocene means to freely float in the air, challenging physical, political and imaginary limits; through every new aerosolar flight, we increase our sensitivity to the air, by learning more about the rhythms that naturally encircle us.
The practice of Free Flight journeys—much like the universe—is expanding, thanks to the ongoing commitment of the Aerocene community around the world.
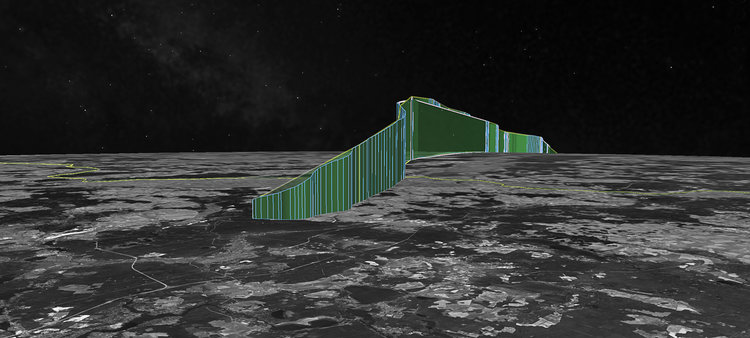
Follow the 26 Steps to be On Air and discover how to get Aerocha(i)n(ge): a new currency to reward sustainable and lighter than air mobility. A sign with Aeroglyphs—the trajectories of the aerial journey—it’s a sign to declare our independence from fossil fuels. Aerochange is earned and calculated by the algorithm:
Max altitude x 1 + distance x 1 + crossed borders x 3 + recovery x 2 + duration x 1 + distance traveled to recover x 0.1
Follow the steps carefully and keep it with you during your first flight!
The present manual was produced by the Aerocene Foundation and is licensed under a Creative Commons Attribution-ShareAlike 4.0 International License.
We are privileged to be able to be on air. We need to work hard together to protect this privilege and never give anyone a reason to doubt our ability to launch aerosolar sculpture without placing others in harm’s way. Always follow your local aviation authority regulations and remember the aerosolar sculptures and payloads are not toys and the practice can be dangerous if not properly initiated. Aerocene Foundation is not liable for any damage to persons, things or property that might result from solar balloon construction, flight and any and all related activities. In no event shall Aerocene Foundation be liable for any direct, indirect, punitive, incidental, and/or special consequential damages whatsoever arising out of or connected with the use or misuse of its sculptures. The participant assumes all risk and liability resulting from any use of all Aerocene sculptures. Your participation and use of any Aerocene sculpture constitutes your agreement to and acceptance of these terms.
0. DIT - DO IT TOGETHER

BECOMING WEATHER DEPENDENT WITH THE ATMOSPHERE AND FRIENDS
Launching an Aerocene sculpture is not a solo adventure! It is a collective action that starts with preparing supplies for all, so, get your team together! Take your time to research: for this activity you will need to cover five* important tasks.
LEGAL & SAFETY TEAM
Tasks: Every step related to the application for permission—from the landowner of the launching spot and from the Air Aviation Authority of your country, stipulate a private Insurance. For more info go to steps: 01: CHOOSE LOCATION, 02: CHECK THE WEATHER FORECAST; 03: PREDICT THE JOURNEY; 04: GET INSURANCE; 05: SUBMIT YOUR PERMISSION
BALLOON TEAM
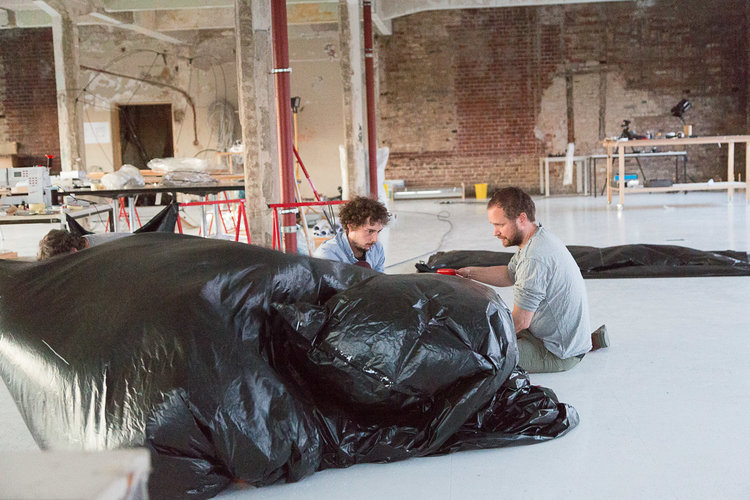
Tasks: Build or borrow the Aerosolar sculpture—find out how at station 6. BUILD/BORROW YOUR OWN AEROSOLAR SCULPTURE
PAYLOAD TEAM
Task: Build or borrow the device that will be attached to the sculpture—learn more at the stations directed in the step 7. BUILD/BORROW YOUR OWN PAYLOAD: FROM AIR QUALITY MONITOR SENSORS TO SENSE THE LIFE IN THE AIR, HOW TO BUILD A TRACKER DEVICE, AN INFRASOUND RECORDER AND CUT-DOWN MECHANISMS!
LAUNCH TEAM
Tasks: Organize the launch day and make sure all is ready to go on air! On site you need a minimum of three people for this activity: two for dealing with the sculpture and one dealing with technical devices.
RECOVERY TEAM
Tasks: Track and recover the sculpture and payload launched. Requires a minimum of 2 persons living nearby the predicted landing point. Usually, since the sculptures travel between 400-600 km, the recovery team is not based in the same country from where you launch.
For more info go to steps: 21. TRACK IT 22. HOW TO SPOT IT? 23. FOUND IT.
* or six! (HEAD OF COMMUNICATIONS)…sometimes it is easy to have one person to keep all the teams updated and help them communicate.
1. CHOOSE LOCATION
UNDERSTAND THE BORDERS OF THE ANTHROPOCENE
AN AEROCENE JOURNEY BEGINS WITH UNDERSTANDING YOUR SURROUNDINGS. AFTER BUILDING YOUR TEAM YOU NEED TO MAKE SURE TO FIND THE RIGHT LOCATION IN ORDER TO COMPLY WITH THE SAFETY PROCEDURES OF THE FOSSIL FUEL BASED AIRSPACE CLASSIFICATION.
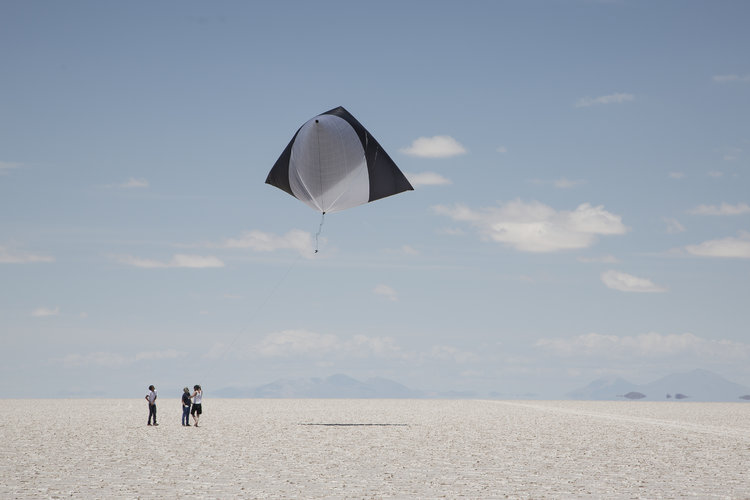
The best launch pad is a flat and relatively soft surface, like a beach or a grassy field – no hard surfaces like pavement, or rocky areas with stones or sharp vegetation, as these could damage the sculpture on the ground. The ideal surface will also be light in colour with a high albedo (such as a white-sand beach), to more easily reflect the Sun’s rays, though this is not a necessity. For optimal lift conditions, choose a place where you can see the Sun rise and arrive about 30 minutes before dawn to start inflating the sculpture. Do not choose a location with large obstacles like tall trees or buildings, as the amount of direct sunlight will be reduced. Make sure you have room to support the sculpture until it is high enough to carry the payload and also a few more meters to be sure it does not come down again. All in all you should have min 300m in the direction the wind blows without any trees to have a successful launch.
Never fly an Aerocene sculpture in an area with tall obstacles. Even if the wind is blowing in the other direction, you should keep in mind that it can change direction at higher altitudes.
Never fly an Aerocene sculpture close to a city or airport. The air above cities and airports is heavily restricted. You should avoid launching an Aerocene sculpture within a radius of 10 km of a city or airport… even if the wind is blowing in the other direction! It’s important to know that due to jetstreams, the main wind direction in Europe usually comes from the West (~95% of the time). So, the balloon will most likely drift East, so bear this in mind when mapping your potential obstacles. This is important because it’s more likely to get a launch approval if you consider these factors first! Depending on the country, getting the approval can take between 2 weeks-3 months.
2. CHECK THE WEATHER FORECAST

BECOMING WEATHER DEPENDENT
AEROSOLAR FLIGHTS ARE WEATHER-DEPENDENT. THE IDEAL CONDITIONS FOR A SOLAR LAUNCH TO BE SUCCESSFUL ARE: LITTLE OR NO WIND AT ALL AND LOTS OF SUNLIGHT. SINCE THESE FLIGHTS REQUIRE PLANNING IN ADVANCE, KNOWING AND CHECKING THE WEATHER WITH RELIABLE TOOLS IS ESSENTIAL.
The idea is to construct a shared platform to learn how to read weather patterns and relate to atmospheric events, harnessing knowledge from human and non human subjects.
The Aerocene community has found most success using windy.com, and from our experience the wind forecasts are reliable within the range of 7 days. Remember: never fly an Aerocene sculpture when the wind speed is higher than 5 km/h.
A very important part of every Aerocene launch begins a few days beforehand, when you check the weather. Plan your launch for a day with optimal weather conditions – a bright, sunny morning with zero (or very mild) winds. This will ensure a safe experience for you and the Aerocene sculpture.
In the age of the Anthropocene, it has become possible to ignore the tumultuous variation of the natural world, to usurp its control by jet plane and rail road, cutting through wind and storm with petrol, riding floods with motorised engines, ironically contributing, in the propulsion of greenhouse gases, to the increasing unpredictability of the weather phenomenon. Contrastingly, Aerocene aims to draw the weather out of obscurity, by proposing a new sensitivity.
Never fly an Aerocene sculpture in an area with tall obstacles. Even if the wind is blowing in the other direction, you should keep in mind that it can change direction at higher altitudes.
Never fly an Aerocene sculpture close to a city or airport. The air above cities and airports is heavily restricted. You should avoid launching an Aerocene sculpture within a radius of 10 km of a city or airport… even if the wind is blowing in the other direction! It’s important to know that due to jetstreams, the main wind direction in Europe usually comes from the West (~95% of the time). So, the balloon will most likely drift East, so bear this in mind when mapping your potential obstacles. This is important because it’s more likely to get a launch approval if you consider these factors first! Depending on the country, getting the approval can take between 2 weeks-3 months.
3. PREDICT THE JOURNEY
CROSS BORDERS!
WHERE WILL YOUR AEROSOLAR SCULPTURE LAND? IT IS CRUCIAL TO BE ABLE TO PREDICT THE TRAJECTORY OF THE FLIGHT, SINCE FOR LEGAL REQUIREMENTS, AN ESTIMATED LANDING POINT HAS TO BE SUBMITTED FOR THE PERMISSION TO GO THROUGH. KEEP IT LEGAL WHILE CROSSING THE BORDERS IMPOSED BY FOSSIL FUELS!
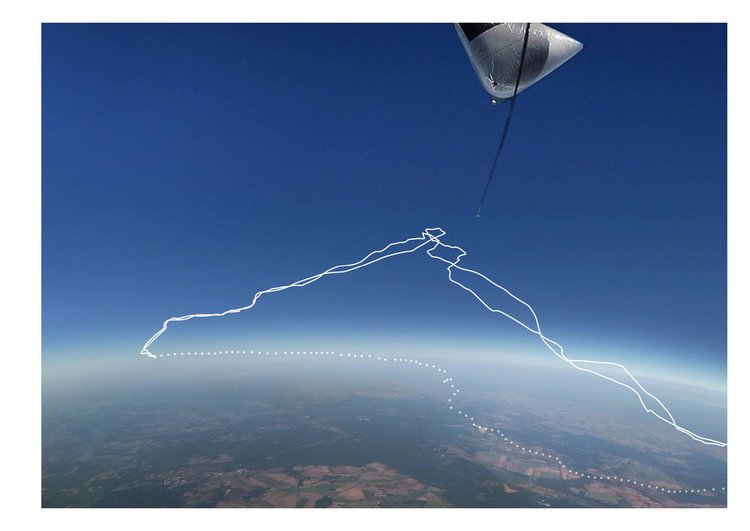
It is important that you understand the atmospheric signs before you launch in order to be aware of where you might go. Just because the wind is blowing in one direction on the ground does not mean that it is blowing the same direction two miles up. In fact, the opposite is most likely true. We have experienced multiple launches where our Aerocene sculptures took off travelling west, yet still landed east of our launch site.
How do you know where the sculpture will go during the flight? You can make a guess by looking at weather forecasts and through the FLOAT PREDICTOR or Habhub predictor on www.habhub.org. Invite your friends to guess the landing point…it’s funny seeing how wrong you can be about wind directions and become weather-sensitive while playing together!
4. GET INSURANCE
THE FIRST AEROSOLAR WEATHER DEPENDENT INSURANCE
THE AEROCENE FOUNDATION GAINED AN IMPORTANT ACHIEVEMENT LAST YEAR: THE RIGHT TO THE FIRST EVER AEROSOLAR INSURANCE, A VERY SPECIFIC WEATHER-DEPENDENT INSURANCE ALLOWING A WINDOW OF 2 WEEKS FOR LAUNCH, AS OPPOSED TO HAVING TO PAY DAY-BY-DAY, WHICH CAN BE PROBLEMATIC AS THE WEATHER CHANGES.
Usually, larger insurance companies have their own aviation section, that incorporates the way Aerocene flies. Insurance is needed because your aerosolar sculpture has to be ready to face the fact that airplanes rule the air.
Insurance companies have no special offers for solar balloons and since solar balloons are different to ordinary helium-weather balloons, you have to ask for an individual offer. Mostly it doesn’t change the charge of a standard weather balloon insurance. Make sure they know what you are talking about. In Europe the insurance for one balloon for one day costs around 100€. Depending on the country, the insurance company requires 1-2 weeks in order to be ready.
5. SUBMIT YOUR PERMISSION
THE RIGHT TO FLOAT
UNDER THE CURRENT SYSTEM, IN ORDER TO FLY OVER ANY COUNTRY IT IS NECESSARY TO SECURE PERMISSION FROM THE RELEVANT NATIONAL AUTHORITIES. EACH COUNTRY HAS ITS OWN LAWS OF THE AIR, SETTLED UNDER A GENERAL INTERNATIONAL FRAMEWORK GIVEN BY THE INTERNATIONAL CIVIL AVIATION ORGANIZATION.*
In the category light (max. 4 kg), the total maximum payload must include all trackers, the balloon and ropes. Each part of the payload cannot be heavier than 500 gr.
Facilities like the FAA (US) or Landesluftfahrtbehörde (Germany) have to approve your launch. These procedures might vary in different countries but in general they will ask for:
- Launch location (Exact coordinates)
- Max. weight
- Length (top-bottom)
- What payloads are you going to fly?
- Flight duration (e.g. from 11:00 UTC to sunset+2h)
- Ascent rate (usual ~61m/min for solar balloons)
- Descent rate (~305m/min)
- Max. Altitude (usual ~15240m)
- Colour of the sculpture**
- A mobile number so that Air Traffic Control can call you during the flight
If you like to know more about the current status of Aerocene dialogue with the European Minister of Transportation on how to amend the Rules of the Air for Aerosolar vehicles, please check Aerocene.org website and forum.
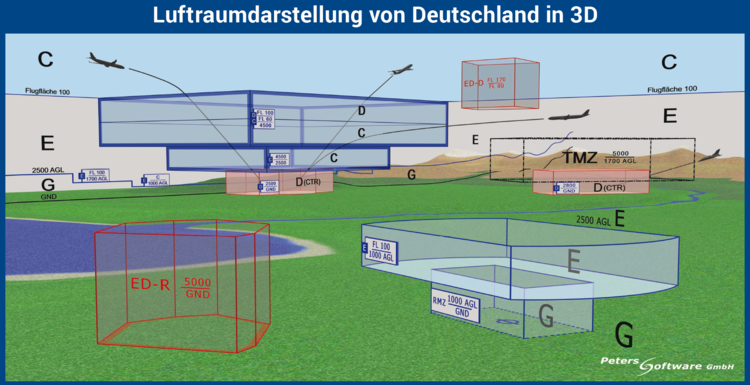
*Today air traffic is regulated by the Annex 2 to the Convention on International Civil Aviation, also known as the Rules of the Air, which are published by ICAO. The Rules of the Air provide a general framework that is agreed upon worldwide. Each country then adapts the Rules to its own needs. For example, airspace is divided in classes (portions of air space with different rules). But the exact meaning and regulations for each class change from country to country. For each and every flight it is thus necessary to know (and comply with) the air regulations in all the countries that will be overflown.
**It is very important to write in the application for permission a little description explaining what the aerosolar sculpture looks like and how it works. Most facilities are accustomed to ordinary latex-helium balloons, but they might not know what a solar balloon is and how it works.
6. BUILD/BORROW YOUR OWN AEROSOLAR SCULPTURE
TO PLAY IN THE THERMODYNAMIC IMAGINARY
THERE ARE MANY WAYS TO GET AIRBORNE...FOSSIL FUEL FREE! IF YOU'D LIKE, YOU CAN BORROW A SOLAR SCULPTURE FROM AEROCENE FOUNDATION: THE AEROCENE BACKPACK. THE AEROCENE BACKPACK IS A TETHERED-FLIGHT STARTER KIT, WHICH ENABLES ANYONE TO LAUNCH THEIR OWN AEROCENE SCULPTURE AND START SENSING THE ATMOSPHERE.
Get in touch with Aerocene Foundation to borrow one!
Alternatively, you can build a model from scratch following the instructions here! Which colour is the best? Black objects attract light and heat better than white ones, as the colour black absorbs all the wavelengths of light and reflects none, while white objects do the opposite. A black envelope would absorb the most sunlight and retain the most heat, resulting in greater buoyancy and a more powerful upward lift force.
7. BUILD/BORROW YOUR OWN PAYLOAD
TO PLAY IN THE THERMODYNAMIC IMAGINARY
WHAT IS FLOATING IN THE OCEAN OF AIR ABOVE US? WHAT IS THE SOUND OF THE ANTHROPOCENE? HOW CAN WE RE-ESTABLISH A MORE ATTUNED RELATIONSHIP WITH THE ATMOSPHERE? AEROCENE SCULPTURES ALLOW YOU TO TAKE AERIAL PHOTOGRAPHS AND VIDEOS, TO COLLECT PLENTY OF DATA USING SCIENTIFIC TOOLS THAT SENSE AIR QUALITY, ATMOSPHERIC PARAMETERS, THE SOUND OF THE AIR AND MORE.
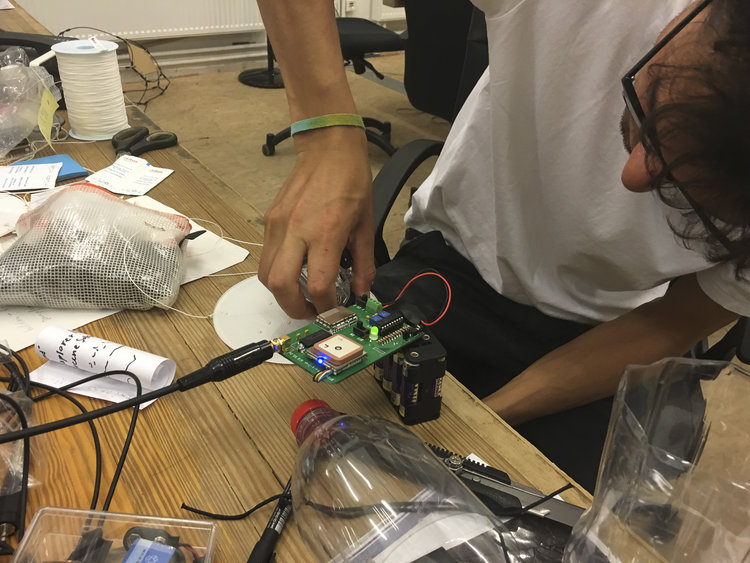
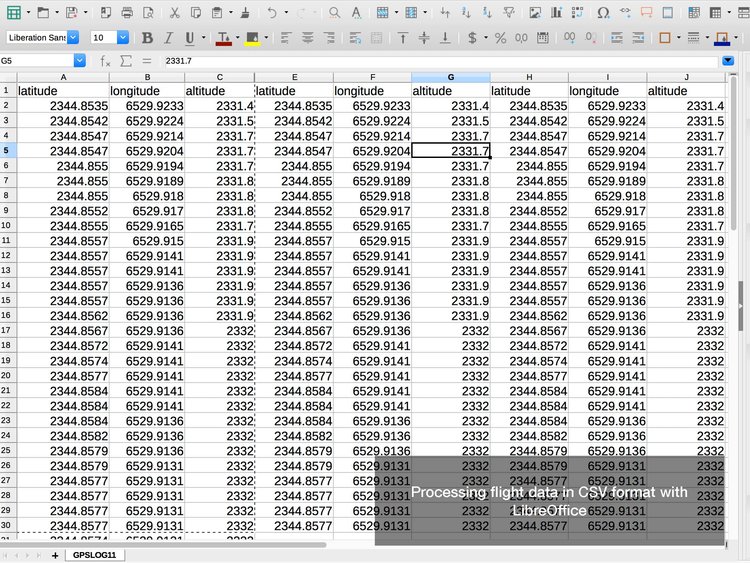
The Aerocene community usually uses a device-in-a-bottle that can measure atmospheric data and GPS coordinates to create Aeroglyphs—signatures signed in the air for independence from fossil fuels. If the sculpture is going to fly freely, you definitely need to be able to track it to comply with aviation authorities. But what about measuring the levels of pollution in you area? Recording the sound of the Anthropocene, through engulfing noise pollution? Want to study the infinite wealth of life in the air?
There are many other possible devices and versions of payloads that you can attach to an aerosolar sculpture, so make sure to read here to find out how to BUILD A LIGHTWEIGHT PAYLOAD and start to discover the air!
8. GET A CALL SIGN

IT'S LIKE A LICENSE PLATE
A CALL SIGN IS A WAY TO IDENTIFY A TRANSMITTER OF A RADIO COMMUNICATION. YOU HAVE TO BE VISIBLE FOR RADARS AND YOUR POSITION HAS TO BE TRACKABLE. ONE OPTION IS TO RELY ON APRS (AUTOMATIC PACKET REPORTING SYSTEM), A RADIO LOCALIZATION SYSTEM FROM THE WORLDWIDE RADIO AMATEUR COMMUNITY.
APRS allows us to receive important telemetric information such as; distance from the launch site, current position, speed and altitude. In order to operate in APRS you need to be a certified radio amateur…but don’t worry, you can find a friend who is registered, contact the Aerocene community, or even team up with a radio amateur from your area and ask to use their call sign for your aerosolar flight.
9. TUNE IN ALL ON THE SAME FREQUENCY

JOIN THE LAUNCH TOWARDS AN EPOCH BEYOND PETROL-BASED PRACTICES
SHARE ALL DETAILS, THE CALL SIGN NUMBER AND FREQUENCIES OF TRANSMISSION WITH RADIO AMATEURS GROUPS, THEY WILL HELP TRACK THE FLIGHT!
Now that you have permission, insurance, your aerosolar sculpture and all payloads ready it is time to share the date and details with the worldwide community: let the journey begin!
Invite and reach out to the rest of the community and beyond, to get support, help and to grow the community. The launch day is a great experience and even more memorable if you Do It Together!
10. ONE DAY BEFORE: ALL READY?
FLOAT ON AIR FREE FROM CARBON EMISSIONS!
FIRST: DID YOU CHECK THE WEATHER? IS IT READY TO TAKE THE AEROSOLAR SCULPTURE ON AIR? BEFORE GOING TO THE LAUNCH SITE TO START FLOATING, YOU ALSO NEED TO TEST YOUR HARDWARE AND MAKE SURE EVERYTHING IS READY.
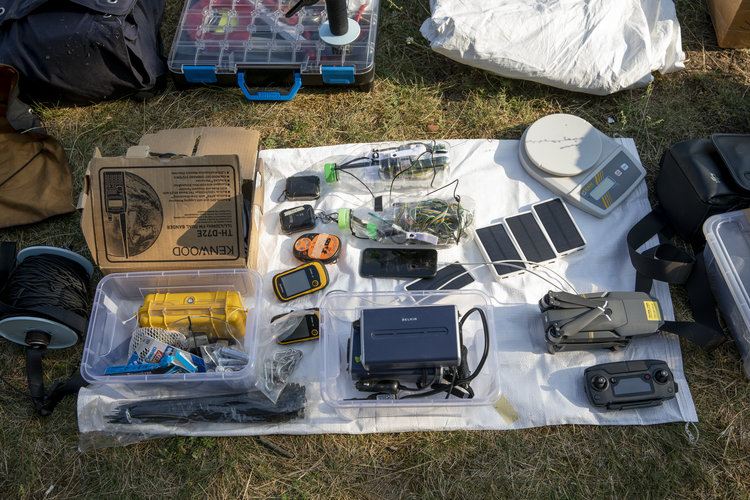
After you’ve inflated your sculpture, it’s not the best time to discover that the batteries on your tracker are dead. So, charge the batteries and load whatever is necessary…THEN go through your equipment. We made a checklist for you:
❏ Aerosolar sculpture
❏ Payloads
❏ Rope for holding the sculpture on the ground
❏ Gloves holding the rope secure
❏ Tape and fixing material for eventual damage of the sculpture during the launch procedure
❏ Optional: a tall white tarp for covering the ground to prevent the sculpture from getting wet or damaged by thorny plants
❏ Knife or scissors
❏ Aeronautical Map
❏ Compass
❏ Ruler
❏ Pens and paper
❏ Extra rope
❏ Extra batteries
❏ Extra sculpture
❏ First Aid Kit
Now, pack everything!
11. GO TO THE LAUNCH PAD
… IF IT'S NOT TOO WINDY
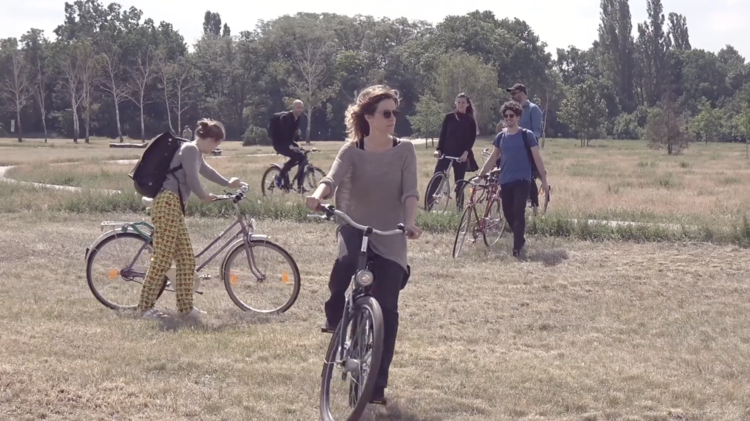
TRY TO DO THIS WITH THE SMALLEST CARBON FOOTPRINT YOU CAN MANAGE. GO BY BIKE OR TRAIN, OR EVEN RUN OR SAIL! ON THE MORNING OF YOUR LAUNCH, WE RECOMMEND ARRIVING AT THE LOCATION 30 MINUTES BEFORE SUNRISE SO THE AEROSOLAR SCULPTURE IS INFLATED AND READY WHEN THE SUN COMES UP.
Early mornings equals strongest lift, as winds are relatively low and the difference between the heated air inside the sculpture and the cool morning air outside will be the greatest. Launching at other times is possible, but the lift will not be as strong.
Once you get to your launch site, first consider the wind. Make sure there are no obstacles in the flight path directly downwind from your launch site. Aerocene does NOT recommend attempting to inflate a balloon if the wind is gusting at more than 5 km/h.
12. BE READY TO GET AIRBORNE

IN A NEW EPOCH-IN-THE MAKING TO OVERCOME EXTRACTIVISM
IT'S TIME TO TAKE OUT THE SCULPTURE: ONCE YOU ARE AT THE LAUNCH SITE, FIRST CHECK THE GROUND FOR SHARP OBJECTS THAT COULD CAUSE DAMAGE TO YOUR SCULPTURE.
Make sure everyone who handles the sculpture puts on gloves first.
Gloves should also be worn when holding the tether rope. If you have a tarp with you, unravel it and start unfolding the sculpture on it. While doing that, keep in mind unfolding it with its opening facing the wind. Hold it tight!
Unfold the sculpture on the ground, prepare the rope for tethering, and open the Velcro closure. Unlike other airborne vehicles, the process of inflating aerosolar sculptures releases zero carbon emissions nor particulates and requires zero gas, engines, batteries, or generators.
13. LET THE AIR FLOW
BREATHING WITH THE EARTH, FILLED ONLY WITH AIR, LIFTED ONLY BY THE SUN, CARRIED ONLY BY THE WIND
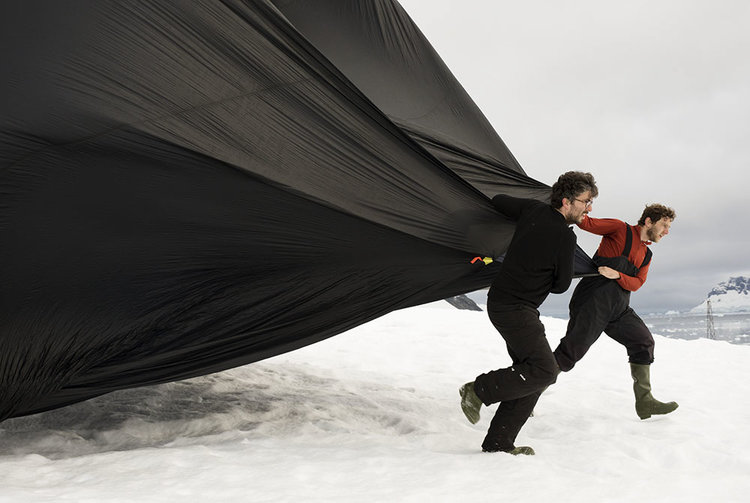
FILL UP THE TANK! WARM UP TIME: STRETCH YOUR LEGS, DEEP BREATHS...AND START THE INFLATING SESSION. FOR INFLATING THE SCULPTURE YOU NEED TWO PEOPLE AND SOME SPACE.
Hold the sculpture at the opening with two hands and from both sides, then start running so that it can fill up with air. You probably have to run a few times back and forth, or even better, if you have the chance, in a circular path, until the sculpture is fully inflated. Once the balloon is inflated you have to close it, tying off with velcro positioned at the bottom of it.
Sign up to join the next Aerocene launch program! Find the table to subscribe with your contacts and we will let you know about the next flights schedule! Sign up there, ask the mediateurs or contact the Foundation!
Aerocene sculptures take about an average of 5 minutes to inflate and, according to the weather conditions, about 10 minutes to start to float.
Aerocene sculptures are able to rise off the ground because of variations in air temperature and density. A solar balloon can only float when the air inside is warmer than the air outside. When the air inside gets warmer, its density decreases, and less dense air rises. This is the same way a hot air balloon functions, except that a hot air balloon is lifted by the heat generated from a gas burner, and Aerocene sculptures are lifted by the power of the Sun.
14. TOOLS AND DEVICES READY

...SET UP COMPLETED!
ATTACH THE PAYLOAD AT THE BOTTOM OF THE SCULPTURE AND SECURE IT WITH GOOD KNOTS AND/OR LIGHT CARABINERS.
Each payload has to be mounted in the right way and it’s important to check the directions of camera and the positioning of sensor wires, so you can sense atmospheric data.
Watch out and take care of:
❏ APRS tracker turned on and transmitting position online
❏ Camera secured, turned on and recording
❏ Additional Payloads ready
15. AERONAUTS, UNITE!

SHARING YOUR RESPONSE-ABILITIES
GATHER EVERYBODY FROM TEAM AND VISITORS: IT IS VERY IMPORTANT TO REMIND EVERYONE ON SITE WHY YOU ARE THERE AND THE PREPARATORY WORK THAT LEAD TO THE LAUNCH DAY.
Share what each team achieved and guess where the sculpture could land with your newfound weather-sensitivity and compare your estimate to the projected trajectory of the sculpture on a smartphone. It is very important to create awareness by sharing common knowledge and don’t forget to make it simple: sometimes unexpected visitors joins, from human to more-than-human, and everybody is welcome to share their opinions!
16. DON’T FORGET TO TURN EVERYTHING ON!

EVERYTHING...ON AIR
LAST CHECK: ALL DEVICES ON? (ARE YOU SURE?)
Believe us, even after several launches we still manage to make silly mistakes…we suggest that after double-checking, you check again.
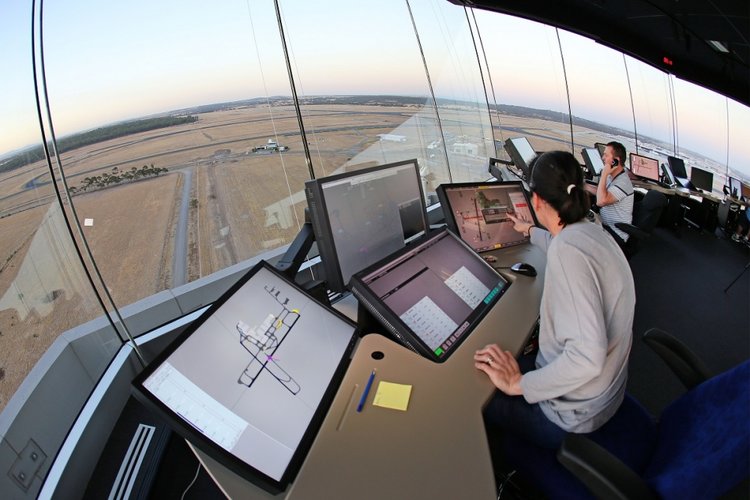
17. CALL AIR TRAFFIC CONTROL!
EXPERIENCE THE SHACKLING RULES OF THE AIR
IT IS VERY IMPORTANT TO CALL AIR TRAFFIC CONTROL AT THE EXACT MOMENT OF TAKE OFF.
Be ready to call and communicate to them that the sculpture is flying in the predicted direction.
18. USE YOUR NEW AEROSOLAR INTUITION

ADJUST TO THE RHYTHMS OF THE PLANET
WATCH OUT! WAIT FOR THE RIGHT MOMENT, BUT HURRY UP: IT MIGHT GET WINDY! BEFORE IT CAN BE LAUNCHED, YOUR SCULPTURE NEEDS TO WARM UP. THIS CAN TAKE UP TO HALF AN HOUR, DEPENDING ON THE INTENSITY OF THE SUN.
To make sure that the air stays inside, hold the opening closed during this time. You will know when the air inside is warm enough by observing the sculpture’s behaviour: if the wind is very slow or if there is no wind at all, it will try to rise and you will feel the power of the Sun in your hands.
Remember, never fly when the wind blows more than 5 km/h otherwise keeping the sculpture under control on the ground will get difficult and you will not notice the moment when it is heated up enough to launch.
19. NOW…LET IT GO!

ENTER Aerocene: A NEW ERA UNCHAINED FROM FOSSIL FUEL ADDICTION
CONGRATULATIONS, NOW THE SCULPTURE IS READY TO TAKE OFF.. REMEMBER THE CHAPTER ABOUT WEATHER FORECASTING? THIS IS THE MOMENT OF TRUTH.
The first five minutes of the flight are the most critical and decide the overall success or failure of the whole journey. When you leave the sculpture it will slowly start lifting up, and while it is doing that, you should follow it, holding the payload until it is high enough to carry it…then let go!
Remember, never fly when the wind blows more than 5 km/h otherwise keeping the sculpture under control on the ground will get difficult and you will not notice the moment when it is heated up enough to launch.
20. YOU ARE ON AIR
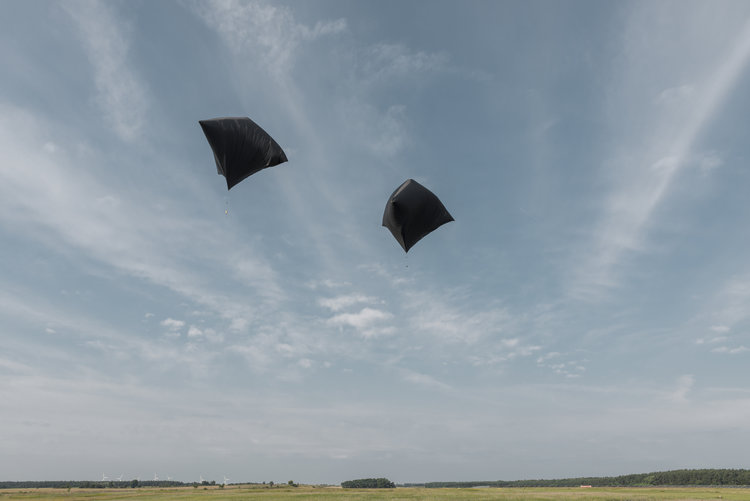
FLOATING FREE FROM BORDERS AND FREE FROM FOSSIL FUELS
STILLNESS IN MOTION…
21. TRACK IT. TRACE IT.

FOLLOW THE JOURNEY
YOU HAVE TIME ENOUGH FOR A SMALL DRINK AND…NOW IT'S TIME TO FLOW WITH THE WINDS AND FOLLOW THE AERIAL TRACE LEFT BY THE AEROSOLAR SCULPTURE. IF YOU ARE IN THE RECOVERY TEAM: BE PREPARED FOR EVERYTHIN
Contrary to the launch site you can’t choose your own landing site. This may cause some surprises when you arrive at the final GPS coordinates.
We suggest the recovery team reaches out in advance to the radio amateur community from the country where you think it will land. Best case scenario, you will find your sculpture lying, perfectly preserved, in an open field, but be prepared to climb a tree or go for a swim, to get it back. Most of the time water landing means the loss of some devices (if not waterproof), but in general the sculpture itself can be recovered without greater damage.
TIPS for recovery team: reach the landing point equipped with a ladder, a long stick (like a fishing rod) and a rubber dinghy.
Remember, never fly when the wind blows more than 5 km/h otherwise keeping the sculpture under control on the ground will get difficult and you will not notice the moment when it is heated up enough to launch.
22. HOW TO SPOT IT?
TUNE IN TO THE RIGHT FREQUENCY
THE RECOVERY TEAM IS ALREADY ON THE MOVE: RADIO AMATEURS IN THE AREA AROUND THE PREDICTED LANDING POINT ARE MONITORING THE TRAJECTORY. AN AJB VHNBHBGEROSOLAR LAUNCH IS ALWAYS A COLLECTIVE ACT, A DO-IT-TOGETHER TRANSNATIONAL AGREEMENT.
23. FOUND IT!

AFTER A BORDERLESS JOURNEY
RECOVER ALL THE EQUIPMENT AND LEAVE NO TRACE OF THE AERIAL JOURNEY IN THE ENVIRONMENT AROUND THE LANDING POINT. AS YOU DID NOT LEAVE ANY CARBON FOOTPRINT BEHIND YOU, YOU PRESERVED THE AIR FROM FURTHER PM2,5 AND CO2 EMISSIONS.
WARNING: never attempt to retrieve your Aerocene sculpture from power lines. If it lands on power lines, call the utility company.
WARNING: never trespass on private property. First contact the landowner before retrieving the sculpture.
WARNING: if you are recovering in forests or thick bush… be on the lookout for dangerous wildlife and poison ivy and make sure everyone is wearing appropriate, protective clothing.
24. SHARE YOUR JOURNEY!
FOR A WORLD FREE FROM CARBON EMISSIONS
AEROCENE HOPEFULLY WILL INSPIRE A FOSSIL FUEL FREE SOCIETY, WITH OPEN DATA, AVAILABLE TO EVERYBODY, ENCOURAGING RESPONSE-ABILITY IN THE ACCESS AND USAGE OF AEROSOLAR SCULPTURES!
Your stories, images and videos can’t wait to be ON AIR! #Aeroceneonair
25. DISCOVER THE OCEAN OF AIR
COLLECT, SHARE AND DECODE TOGETHER THE DATA
WHAT’S ON AIR? ALL PAYLOADS CONTAIN A WORLD: DISCOVER THE DATA YOU HAVE COLLECTED.
26. SIGN WITH THE AIR